Cracking up!
The Truth About Subsidence

It is the scariest word in the property owner’s dictionary because you know you will be facing a bill of four figures and your home will be un-saleable until you get the problem sorted out. But subsidence is something you can help to prevent and often is not a problem.
Your home is unlikely to fall down around your ears – even the most famous case of subsidence, the Leaning Tower of Pisa, is still standing!
Calling in the Experts
Do not expect subsidence to be sorted out overnight. The standard procedure is for the Insurer to ask you to appoint your own Building Surveyor or engineer or send in its own expert. A report setting out the extent of the problem and outlining what should be done will be prepared.
In most cases, it is difficult to say exactly what is causing the problem and the Insurer may want to monitor things for several months, if not years. In the past, people rushed to repair their homes only to find cracks re-appearing because the subsidence had not been stopped.
Counting the Cost
Even though your Insurer will pay for the remedial work (after you have been charged an excess of around £1,000), the disruption is very stressful and you are unlikely to be able to move until your home is secure and given clearance.
There are other financial considerations too. Once your home is back to normal, you will probably be stuck with your existing Buildings Insurer (so forget negotiating premiums). And, of course, your homes track history could put potential buyers off. Some buyers walk away as soon as they hear the word subsidence.
That Sinking Feeling
Subsidence is nearly always related to water or lack of it. Typically, low rainfall causes soil under buildings to dry out and shrink. If the shrinkage is uneven, the foundations of your home will sink more in one part than another. This can lead to everything from cracks to walls to separation from the rest of the building. The most vulnerable homes are those on clay soil. The worst affected areas are London and the South East. About 1 in 50 houses in the region is recorded as having suffered from subsidence over the last 25 years.
It is not untypical that about 1 in 5 subsidence claims result from drains leaking into sandy soil. This is something you may be able to spot at an early stage. In any older property, there is a chance that the drains could be leaking. Specialist companies can investigate this for a reasonable cost (from around £250), and it is worth considering if you are worried about subsidence.
The other cause of ground movement is trees, and this is an area where all homeowners should take extra care.
Still Got That Sinking Feeling?
Most cracks are nothing to worry about. In fact, experts now acknowledge that many homes were underpinned “inappropriately” in the 1980’s (some sources suggest the figure could be over half).
You can help to protect your home by gardening with care and maintaining drains and gutters properly.
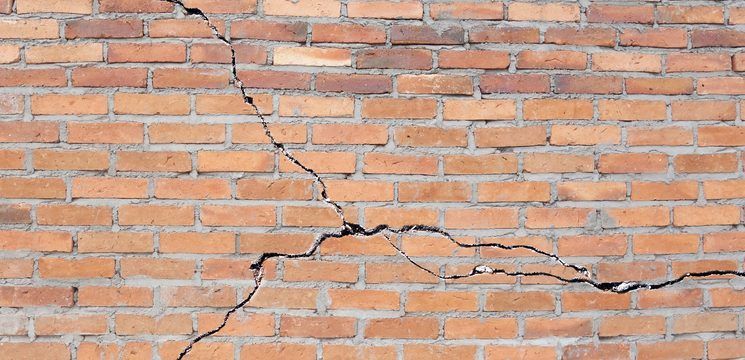
Contact your Insurer if diagonal cracks (5mm wide or more and wider at one end than the other), appear at the corner of windows or door frames. Other areas of concern are cracks around bay windows and floors that suddenly start to slope.
In most cases, you will be asked to wait for at least a few months while your home is monitored to find out the cause of the problem.
Cracks are usually monitored using 'Tell Tales' but you can measure a crack using our handy print at home crack gauge found here. Simply download the PDF and follow the instructions provided to print off.
Once printed, simply place the crack gauge against any visible cracks and line up with the Red shaded areas on the back or use the ruler on the front. If there are cracks around your home that you are concerned about please feel free to take a photo and send them to us along with your contact details and we would be happy to help you.
For expert advice and surveying services contact:
Cowie Consulting Limited
Telephone: 01325 480424
Email: info@cowieconsulting.net
Helpful Guides and News

CONTACT US
Cowie Consulting Limited
Stanhope House
113 - 117 Stanhope Road South
Darlington, DL3 7SF
Phone: 01325 480424
Email: info@cowieconsulting.net


